YAM#
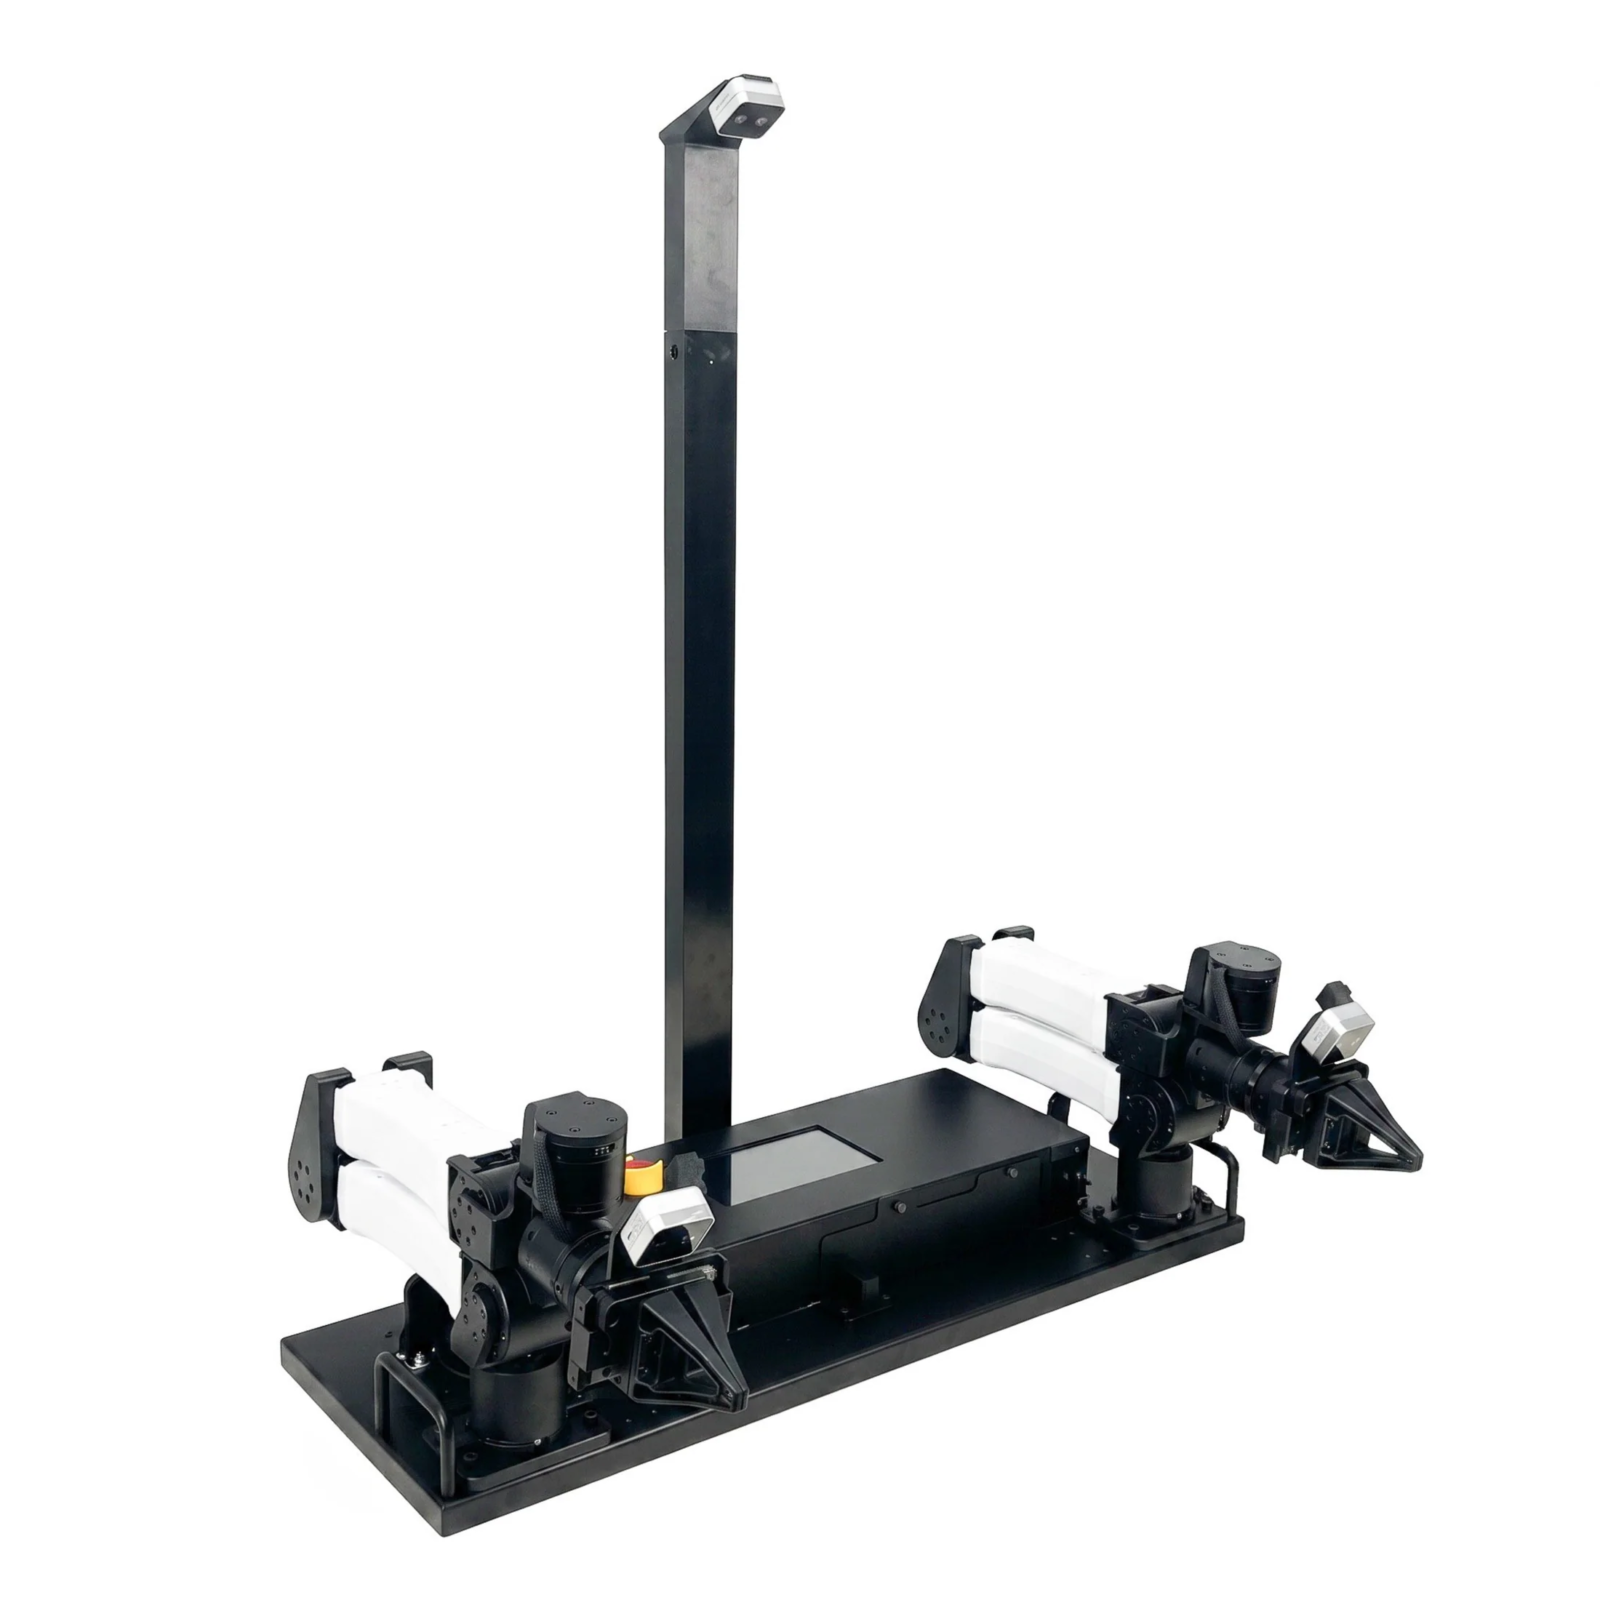
Dual-arm YAM system for real-world experiments.#
RPent controls the dual-arm YAM system through RLinf’s robot interface. For the task video, see YAM demo.
Installation#
Use Linux and Python 3.11. This guide uses two machines:
Control machine: connects both arm CAN interfaces and three RealSense cameras, and runs ENV and RPent.
Inference machine: runs the Pi0.5 VLA service on an NVIDIA GPU.
Use the same RPent code and RLinf commit on both machines. Install uv following Quick Start, then prepare the environment on each machine:
git clone https://github.com/RLinf/RPent.git /path/to/RPent
cd /path/to/RPent
uv venv --python 3.11
source .venv/bin/activate

git clone --branch main https://github.com/RLinf/RLinf.git /path/to/RLinf
git -C /path/to/RLinf checkout --detach 196d40b6dec6f7a4063edee31cfeaa6ca0ee435a
Control machine installation
From the RPent repository root on the control machine, install RPent, RLinf, the i2rt SDK and the required build dependencies together:
cd /path/to/RPent
uv pip install --torch-backend cpu \
  --build-constraints /path/to/RLinf/requirements/embodied/envs/yam-build-constraints.txt \
  -e '.[yam]' -e /path/to/RLinf \
  -r /path/to/RLinf/requirements/embodied/envs/yam.txt
uv pip check
Inference machine installation
On the inference machine, use RLinf’s installer to install YAM and OpenPI dependencies, then install RPent:
cd /path/to/RLinf
bash requirements/install.sh embodied --model openpi --env yam \
  --venv /path/to/RPent/.venv --install-rlinf
cd /path/to/RPent
uv pip install -e '.[yam]'
uv pip check
If system dependencies are already installed, append --no-root to the installer
command.
In each new terminal, enter the RPent repository on that machine and activate .venv.
Calibration#
This guide uses the standard dual-arm YAM kit with three D405 cameras and 0.61 m between the arm bases. Camera and arm-base extrinsics use the official i2rt station model parameters, without separate calibration data collection or solving.
Use robots/yam/config/yam_station_d405.json directly for the extrinsic parameters.
Set the extrinsics path in the robot configuration:
extrinsics_path: /path/to/RPent/robots/yam/config/yam_station_d405.json
The coordinate frame is the left arm base, left_base. Update the corresponding
extrinsics if the arm spacing or camera mounting positions change.
Robot Configuration#
Set the following fields in robots/yam/config/example.yaml for your physical robot:
robot.left_follower/right_follower: left and right arm CAN channels, gripper types, gravity compensation and control parameters.cameras: actual serial numbers fortop,leftandright.topis fixed;left/rightare wrist cameras. The example uses 640x480 at 30 Hz.extrinsics_path: the extrinsics JSON above.Table geometry, joint limits and collision settings: use measurements from the robot’s environment.
resetandpark_on_close: the reset and home poses, respectively. Set measured joint positions for both arms inleft_qpos/right_qpos, with seven values per arm.
After configuring both poses, enable reset.enabled and park_on_close.enabled.
ENV cannot start without a configured home pose. Do not copy another robot’s joint
positions.
To use another file, pass --robot-config /path/to/robot_config.yaml. Specify the
task ID, task instruction, seed and step limit through CLI arguments.
Task Selection#
The main example uses task 1. Task 0 checks planner-driven basic actions,
including small translations, wrist rotations and gripper actions, without VLA. Select
tasks with --task-id; left and right refer to the top camera view:
ID |
Task |
VLA required |
|---|---|---|
0 |
Planner-driven basic action checks |
No |
1 |
Pepsi bottles into the left bag, Coca-Cola bottles into the right bag |
Yes |
2 |
Coca-Cola bottles into the left bag, Pepsi bottles into the right bag |
Yes |
Tasks 1 and 2 both sort three bottles. They also require moving the bowls to
uncover the spoons, putting the white spoon into the white bowl and the pink spoon into
the pink bowl, and returning the bowls to their original marked positions: white on the
left and pink on the right.
The examples below use task 1, seed 0 and a step limit of 1000. ENV and
RPent must use the same settings.
VLA Configuration#
In the RPent environment on the inference machine, download the YAM clean-desk checkpoint:
cd /path/to/RPent
hf download RLinf/RLinf-Pi05-RealWorld-DualYAM-Clean_Desk \
  --revision 15a037b444fa36618a56729fd55a69e09c9983f5 \
  --local-dir ./models/pi05-yam-clean-desk
export YAM_MODEL_PATH="$PWD/models/pi05-yam-clean-desk"
Keep model.safetensors and norm_stats.json in the downloaded directory. For your
own model, you can also provide an RLinf checkpoint directory containing
full_weights.pt and specify its corresponding normalization statistics file.
When deploying to a different physical robot, we recommend collecting new data and retraining the model.
The VLA service uses pi05_yam_joint with camera order top/left/right. Each call
executes the first five action steps.
Data Collection and Training#
For demonstration collection, see the RLinf YAM data collection guide. For model training and evaluation, see Pi0.5 Training and Evaluation on YAM.
Codex Configuration#
Before using Codex, configure separate runtime directories and log in by following Separate Codex Configuration and Login.
Start the Two-Machine Services#
Activate the installed .venv on each machine and start the services as follows:
Control machine: runs RPent, ENV and operator commands, with both arm CAN interfaces and all three cameras connected.
Inference machine: runs the Pi0.5 VLA model service.
The control machine connects to the inference machine’s VLA service through the SSH port forwarding below.
On the control machine, use three separate terminals for ENV, operator commands and RPent. Run these preparation commands in each terminal and keep the task settings consistent:
cd /path/to/RPent
source .venv/bin/activate
export TASK_ID=1
1. Control machine: start ENV
In the ENV terminal, run:
python -m robots.yam.env_server --robot-config robots/yam/config/example.yaml \
  --task-id "$TASK_ID" --seed 0 --max-episode-steps 1000 \
  --transport socket --host 127.0.0.1 --port 8110
2. Inference machine: start VLA
On the inference machine, activate the installed environment, set YAM_MODEL_PATH,
then run:
python -m rpent.robots.components.pi05_vla_server \
  --embodiment yam --model-path "$YAM_MODEL_PATH" \
  --norm-stats-path "$YAM_MODEL_PATH/norm_stats.json" \
  --transport socket --host 127.0.0.1 --port 8220
Open another terminal on the control machine and forward the VLA port over SSH. Replace the inference machine username and address below:
ssh -N -L 8220:127.0.0.1:8220 INFERENCE_USER@INFERENCE_HOST
Keep the SSH connection open. The control machine accesses VLA at
socket://127.0.0.1:8220.
3. Control machine: initialize and start an episode
Once the physical setup is ready, run in the operator terminal:
python -m robots.yam.operator_control --robot-config robots/yam/config/example.yaml \
  --endpoint socket://127.0.0.1:8110 --event status
The first status command starts the cameras and connects both arms.
Set down or remove any objects held in the grippers. Confirm that the reset path is clear, execute the configured reset motion, then read the current episode ID:
python -m robots.yam.operator_control --robot-config robots/yam/config/example.yaml \
  --endpoint socket://127.0.0.1:8110 --event reset_pose
python -m robots.yam.operator_control --robot-config robots/yam/config/example.yaml \
  --endpoint socket://127.0.0.1:8110 --event status
Restore the scene and confirm it is ready. Replace CURRENT_ID below with the
episode_id just printed:
python -m robots.yam.operator_control --robot-config robots/yam/config/example.yaml \
  --endpoint socket://127.0.0.1:8110 --episode-id CURRENT_ID \
  --event start --note 'Scene restored; ready to start this episode'
Manual Skill Tests#
Before testing, stop the Agent, confirm the physical setup, and run the start
command above with the current episode ID.
Basic action checks
python -m robots.yam.manual --task-id "$TASK_ID" --mode primitives \
  --env-endpoint socket://127.0.0.1:8110 --max-episode-steps 1000
Enter one JSON command per line, such as {"tool":"status"}. Supported tools are
move_to, rotate_wrist, set_gripper and release, with parameters passed
through arguments.
VLA prediction and execution checks
python -m robots.yam.manual --task-id "$TASK_ID" --mode vla \
  --env-endpoint socket://127.0.0.1:8110 --max-episode-steps 1000 \
  --vla-endpoint socket://127.0.0.1:8220 --output-dir /path/to/diagnostics
First enter {"tool":"infer"} to save a prediction without moving the arms. After
checking it, enter {"tool":"execute","arguments":{"use_length":5}} to execute the
first five steps. Each prediction can be executed at most once.
Predict again if the prediction is older than 30 seconds or the episode or robot state
has changed. If the execution outcome is uncertain, inspect the physical setup before
proceeding and do not repeat the execution. Enter quit to leave the test and send a
stop request.
After leaving the test, confirm the physical setup, read the current episode ID and run the start command again before starting RPent.
Run a Task#
Complete robot configuration and start the two-machine services, then configure the
planner using Planner Configuration. Before using Codex, complete
Separate Codex Configuration and Login. Replace MODEL_ID with a configured model and choose a
reasoning setting supported by that model. In the RPent terminal on the control machine,
run:
rpent --robot yam --task-id "$TASK_ID" --seed 0 \
  --planner codex --model MODEL_ID --reasoning-effort low \
  --robot-config robots/yam/config/example.yaml \
  --env-endpoint socket://127.0.0.1:8110 \
  --vla-endpoint socket://127.0.0.1:8220 \
  --max-episode-steps 1000 \
  --memory-profile local --memory-dir ./memory/yam
Task 0 uses only basic actions. For this task, set the task ID to 0 in both ENV
and RPent, and replace the VLA endpoint argument in the RPent command with
--without-vla.
Use the browser
Append --dashboard --dashboard-host 127.0.0.1 --dashboard-port 8090 to the same
command. To access the page from your computer, first forward the web port:
ssh -N -L 8090:127.0.0.1:8090 CONTROL_USER@CONTROL_HOST
Open http://127.0.0.1:8090 and submit /rpent-task 1 0. When selecting another
task, update the task ID and seed in both ENV and the browser.
Before switching tasks, close the current ENV using the shutdown procedure, then start ENV with the new task settings. VLA can keep running. See Interactive Usage for browser usage.
View Results#
Run logs are saved in a new directory under logs/. Use --output-dir to specify
another new directory. Check:
result.json: environment success, planner finish requests and runtime errors.transcript_*.jsonandrun.log: messages, tool calls and runtime logs.states.jsonand its referenced RGB, depth, 3D coordinate and state files: observations and actions for each step.episode_*.mp4: saved episode videos. Per-session exploration states are undersessions/session_<NNN>/.
After confirming task completion on site, use status to read the current
episode_id, replace CURRENT_ID below and submit the success result:
python -m robots.yam.operator_control --robot-config robots/yam/config/example.yaml \
  --endpoint socket://127.0.0.1:8110 --episode-id CURRENT_ID \
  --event success --note 'Task completion confirmed on site for this episode'
For failure or abort, use --event failure or --event abort, respectively, and
provide a note.
eval_success=True means the on-site operator has confirmed success for the current
episode.
Tools and State Artifacts#
YAM provides view_env_state, sample_world_xyz, query_world_map, render,
status, move_to, rotate_wrist, set_gripper and release. Connecting
VLA also provides pi05_act.
Select one arm with arm=left/right for basic actions. move_to uses xyz in metres
in left_base and wxyz quaternions. rotate_wrist uses degrees. Gripper val=0
closes and val=1 opens.
Use set_gripper or release to open or close a gripper.
Exploration Mode (Operator Reset and Verdict)#
Append --explore to the task command to explore and accumulate task memory.
--explore-attempts-per-session sets attempts per session, and --explore-sessions
sets the number of sessions.
Add --interactive when you need to enter feedback in the terminal. For browser
interaction, use --dashboard, which cannot be combined with --interactive.
After each attempt, confirm success, failure or abort in the operator terminal. Before
another attempt, set down or remove any objects held in the grippers, restore the scene
and run reset_pose if needed. Use status to read the current episode ID, then
run:
python -m robots.yam.operator_control --robot-config robots/yam/config/example.yaml \
  --endpoint socket://127.0.0.1:8110 --episode-id CURRENT_ID \
  --event ready --note 'Scene restored; ready for the next attempt'
After preparing the scene and running the command above, enter /continue in the
RPent interface. The task stays paused while waiting for operator confirmation. Start a
new run if the task has already ended.
Run /done, /success, /failure and /abort through
operator_control --command in the operator terminal, with the current episode ID and
a note. /done means the scene is ready.
Logs and Memory#
Task experience is saved under --memory-dir, with task memory merged automatically
by default. Use --no-auto-merge-memory to disable automatic merging. See
Memory and Exploration for the directory structure and memory usage.
Stop and Shutdown#
After stopping the task, set down or remove any objects held in the grippers. Confirm that the path to the home pose is clear, then run in the operator terminal:
python -m robots.yam.operator_control --robot-config robots/yam/config/example.yaml \
  --endpoint socket://127.0.0.1:8110 --event shutdown
ENV returns to the home pose configured in park_on_close, verifies arrival, then
disables motor output. If it cannot reach the pose, keep the process running and inspect
the physical setup; do not force it to exit. After ENV exits normally, close the VLA
service and SSH forwarding.